Pushups get all the attention for the upper body pushing Calisthenics movements. However, once you reach a certain amount of strength, the Pushup can become a little obsolete. That’s where Dips come into play.
They are a simple exercise that only requires two parallel (or v-shaped) bars. The upper body movement pattern looks similar to a Pushup. However, the lack of body weight support on your feet makes the Dip much more difficult.
That is why it’s important to learn proper form and how to use regressions and progressions to become Dip professional!
General Dip Form
Always start your dip training with warmup routine. Light running or Aerobic exercise followed by shoulder stretches will get your body warmed and shoulders will be ready for work.
Dips are pretty straightforward with your form but a few cues can make your training that much more effective. Remember, we are all about efficiency here!
If you have portable bars, you can adjust the width of the exercise. Otherwise, you are stuck with the width of the bars you have on hand. In a perfect world, your Dip bars are slightly wider than shoulder-width.
You should be able to Dip down to full depth with your elbows tucked by your side without much flare. If your body fits between the bars the width is good.

At the top of the Dip, you should work to extend your arms fully and push until your shoulders are depressed. If you can keep your shoulders depressed or neutral through the movement it will be much safer for your shoulders.
A good position for the body is a Hollow position, where your legs are straight and your feet are slightly in front of your body. From the side, you’d look like a banana. This makes it easier to keep a slight bend forward with your body for optimal muscle recruitment.
The negative should be controlled and the concentric phase should be explosive but controlled. At the bottom aim to get to a 90-degree angle at your elbow. Lower doesn’t add much to the exercise besides more shoulder joint stress.
Following through with these cues rep after rep will lead to the best training experience and prevent injuries.
How To Move Through Dip Progressions
Just like with the Pushup Progressions, you need to have a plan of attack to move through the movement variations. Establishing a rep goal is always the first step.

Lower reps with high resistance can be stressful on the shoulder, so it’s recommended to not pick a rep goal below 6. Any higher is just fine.
Find the variation that you can just get to your rep goal with. If you have no idea and it’s your first time with Dips, you can complete a little training session to find your starting place.
Follow these guidelines and you’ll find what variation you should be training with:
- Start with Flexed Dip Hangs. If you can hold it for at least 30 seconds, move onto the next progression.
- Perform a maximum set of Negative Dips. If you can reach your goal reps, stop there, rest, and move to the next progression.
- Repeat this process, moving through the progressions, until you can’t reach your rep goal.
You can either start on the progression that you failed on or use the regression right before it.
Once you hit your rep goal on all working sets with one variation, move to the next progression for the next workout.
Or, you can add reps, sets, or decrease rest time between sets to ensure you are performing progressive overload.
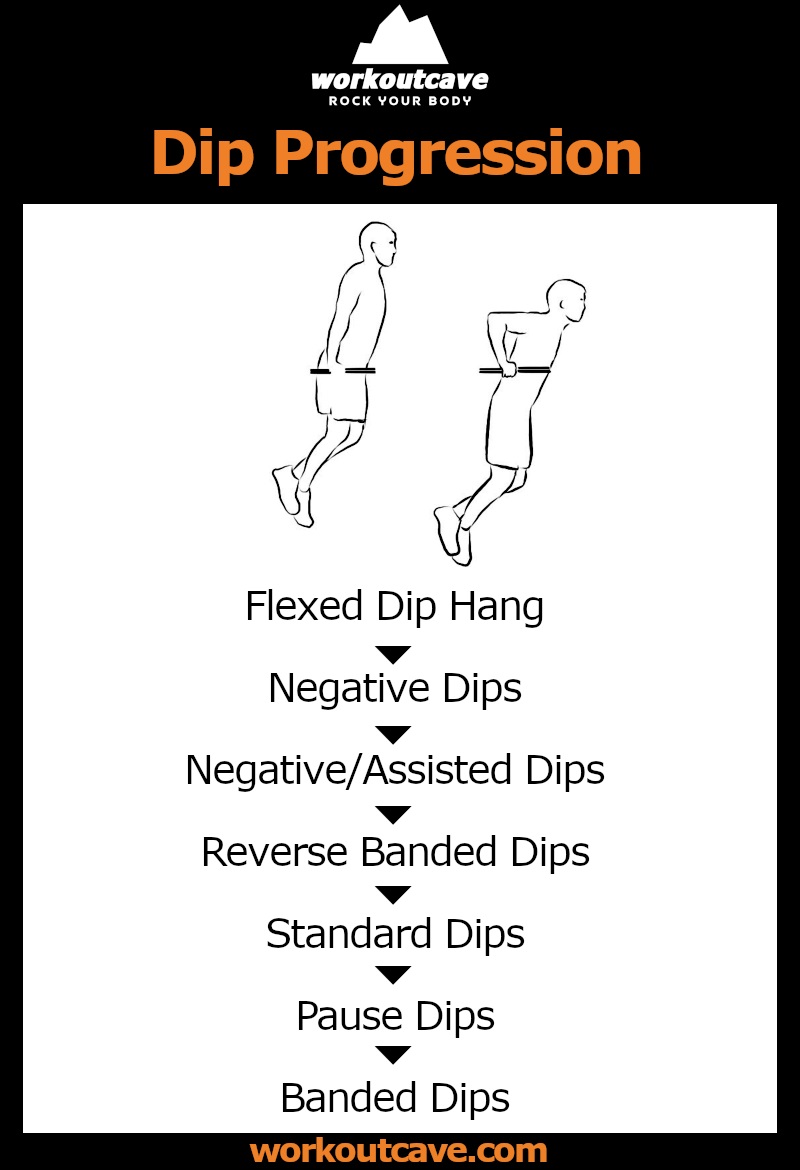
Dip Progressions From Easy To Hard
Flexed Dip Hang
This is a simple movement that shouldn’t require much training. It’s an isometric hold at the top of the Dip movement. Your arms should be flexed and your shoulders should be depressed or at least in a neutral position. You don’t want your shoulders up in a shrugging position. Hold this position for a goal time, usually 30-60 seconds. Keep a Hollow body position the whole time as well. Move into the next progression when you can complete the goal hold time.
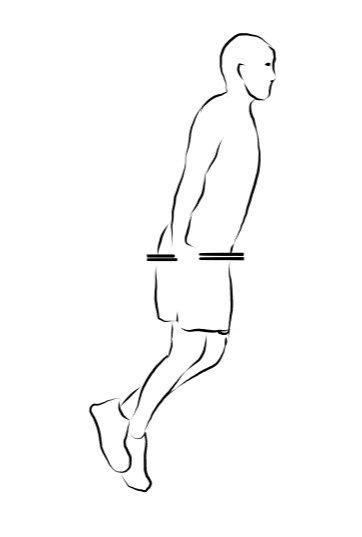
Negative Dips
Either jump to the top of the Dip motion or use a platform to step to the top of it. Slowly perform the eccentric motion for a 5-10 count. At the bottom either jump back to the top or step up from a platform. Move into the next movement. When you can complete your goal reps with each rep taking 5-10 seconds to complete and your body stays in the Hollow position.
Assisted Dips
The negative portion is the same but you just be jumping or stepping to the top of the motion. Use a platform to take some of your body weight and push up to the top using one or two legs for assistance. The less weight you put on your feet the harder the Dip becomes. Remember that you do not use any assistance on the negative. Move on when you can hit your goal reps.
Reverse Banded Dips
Bands are used in the movement to reduce the resistance at the bottom of the motion, which is the hardest part. The bands can be placed on the bars and under your feet. They stretch as you do a negative and contract on the way back up. Progress by using less band tension over time until you don’t need bands at all.
Standard Dips
This is the normal Dip with no assistance. Reach a 90-degree angle at the elbow at the bottom and keep good form throughout.
Pause Dips
Pause Dips require a pause at the bottom of the Dip to reduce the stretch reflex. This makes the concentric portion much harder. Increase the pause length until you reach a 5 count of each pause and still hit your goal reps.
Banded Dips
Bands are used to increase the resistance at the top of the motion, which is the easier portion. The bands need to be secured to the ground and also around your neck. Don’t use so much tension that it puts you at risk for a neck injury. Move onto the next variation when the band tension makes you lean forward too much.
Weighted Dips
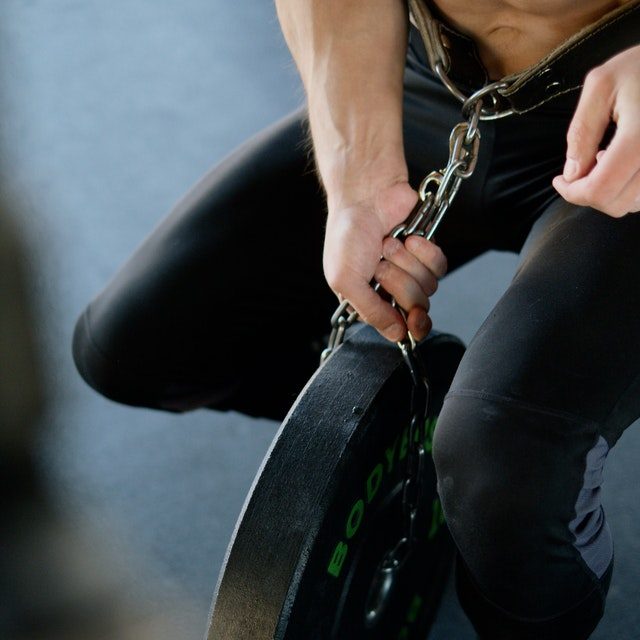
Weights Dips utilize a weight belt or vest. The most common way is to attached a weight to your waist using a dipping belt. Budget version could be wearing a backpack with some weight inside, for example water bottles. Increase the weight over time. You could also throw bands in with this move as well as long as you keep the progression safe.
Other Dip Variations:
These Dip variations aren’t necessarily in the main progressions but may be used for different goals.
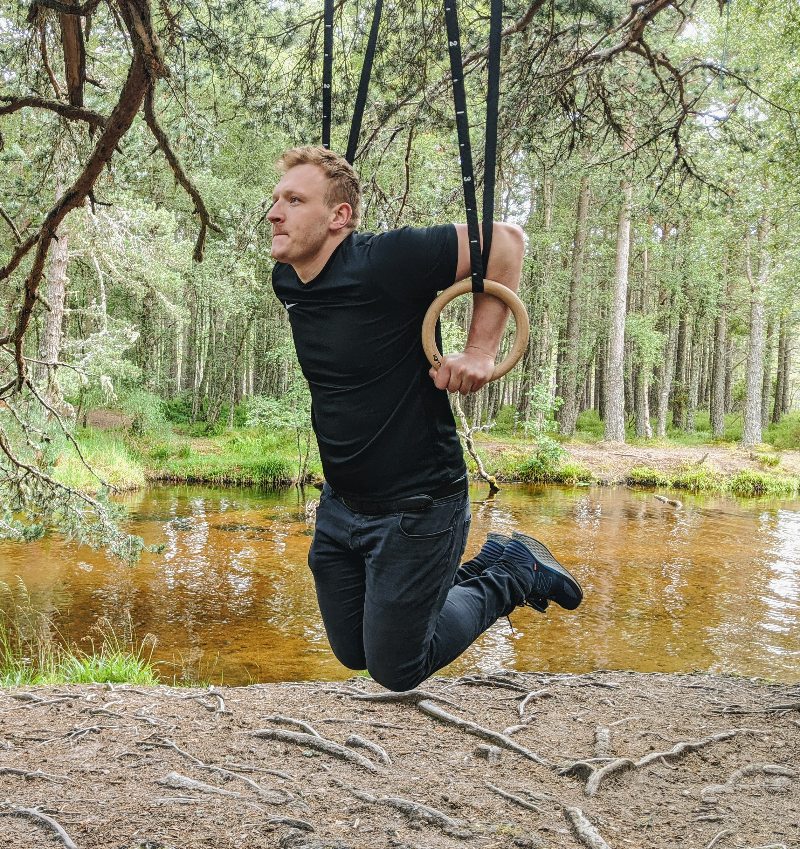
- Ring Dips – the difference between Ring Dips and Bar Dips is just the handles. Rings require more stabilization and are a bit harder. If you’d like you can do all the previous variations on Rings instead of Bars.
- Triceps Dips – these are the traditional Bench Dips that you’ve seen hundreds of times. Your hands are behind your body and your feet are either on the ground or raised on a platform. Then you dip down and come back up. The focus is more on the Triceps and it doesn’t translate well to Bar Dips due to the different body angles and resistance loads.
Workout Summary
Cool down and Stretch
After each training it is beneficial to cool down. Our body is warmed up so it is in the great state to do follow up the workout with home stretch routine or light home cardio exercises. Studies find that cool down routine help athletes to recover quicker and lowers the chances of injuries.
Make it your own
All of us are different and some of the exercises might not be suitable for you. Feel free to pick and choose from this or other home workout exercises to craft a perfect workout for you. I highly recommend you to read a guide on how to make a workout plan to make sure the training is optimal for your goals.
Ready To “Dip” Your Foot In And Start Training?
Dips can be hard for beginners. But, there are regressions and progression pathways that make things easier to work with. Hopefully progression above will provide you with some knowledge and future dips workout motivation.